Build Journal
"Banyan Roots"
"Banyan Roots"
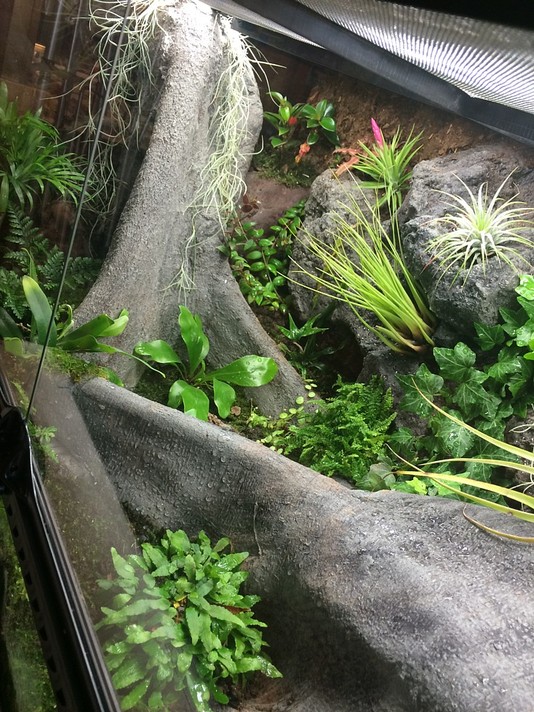
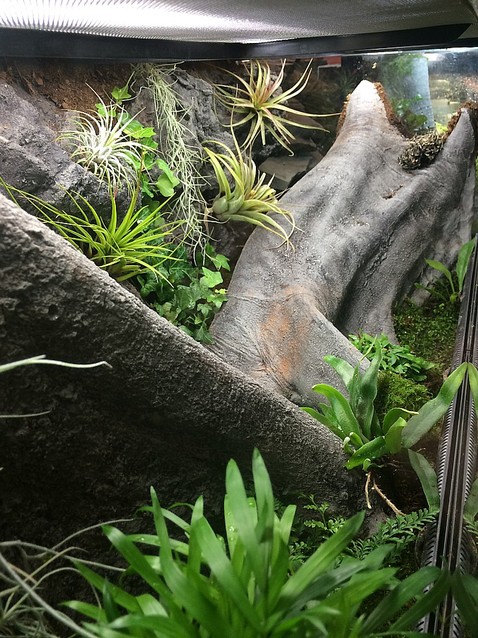
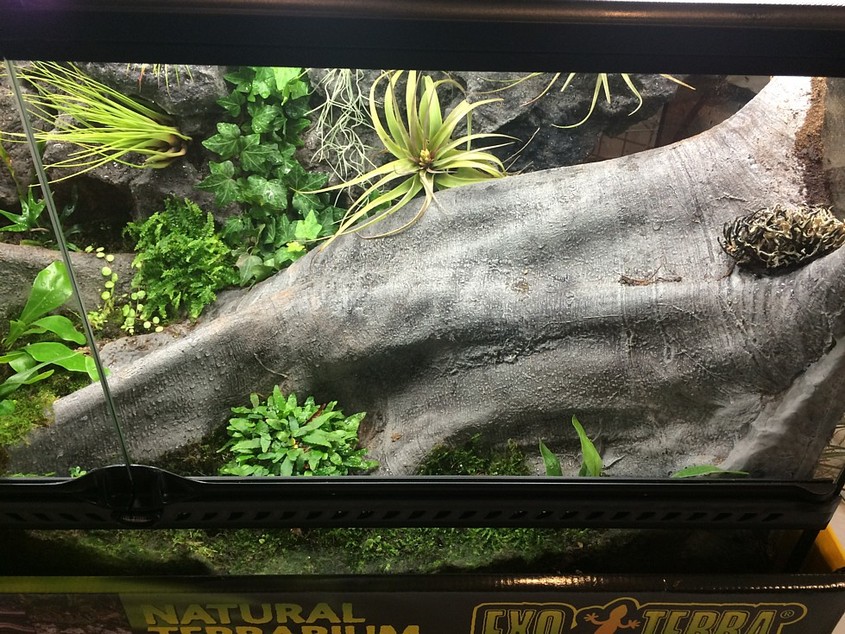
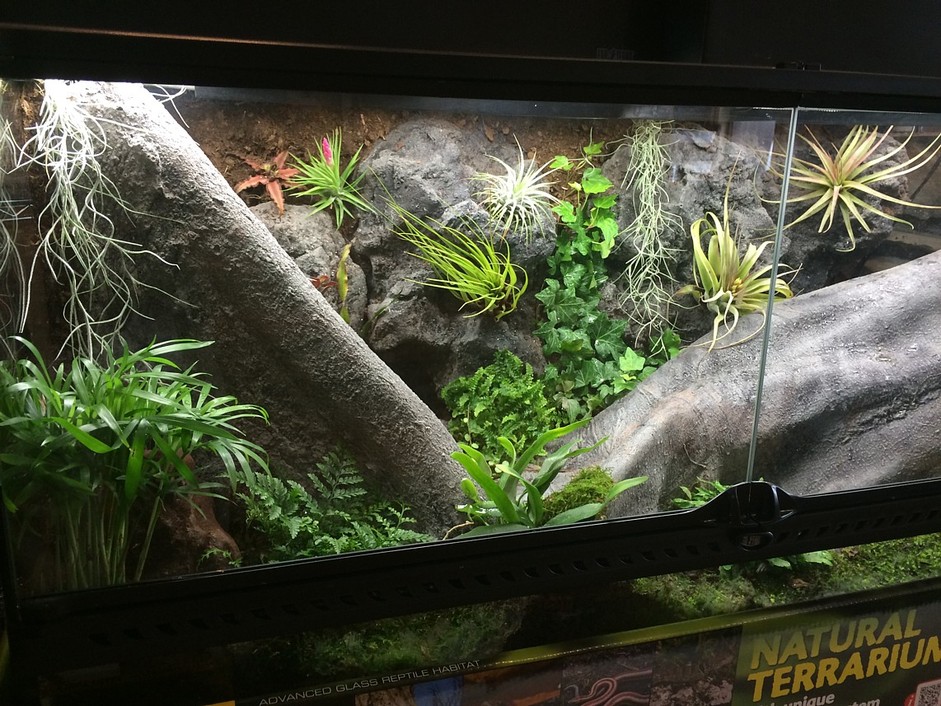
This awesome vivarium was built into a 36" long, 18" tall, and 18" wide, Exo-Terra glass terrarium. I found it at a local chain pet store for a good price and wanted to build a banyan tree root build that showcases the casts I made while visiting Hawaii in 2012 and the beach rocks I molded while in Cozumel in 2013.
The build was very simple and required the following:
36"x18"x18" Exo-Terra Glass Terrarium
24x18 Banyan Root in FlexResin
18x18 Buttress Rock in FlexResin (Brown colored Rock)
Cozumel Rock Set in FlexResin (Grey)
Great Stuff canned spray foam
GE silicone sealant (window and door, brown)
Sphagnum Peatmoss (dry)
vivarium potting soil
LECA (Light Extruded Clay Aggregate) aka "hydroballs"
Sphagnum Moss (dry)
Plants
36" LED lights from www.aquatraders.com
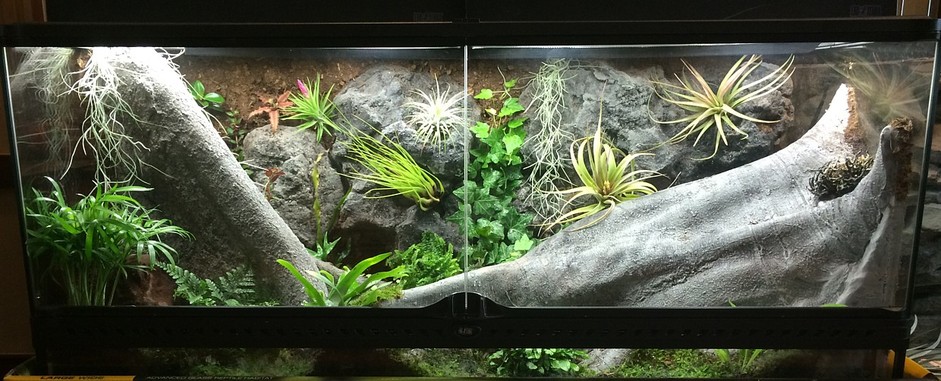
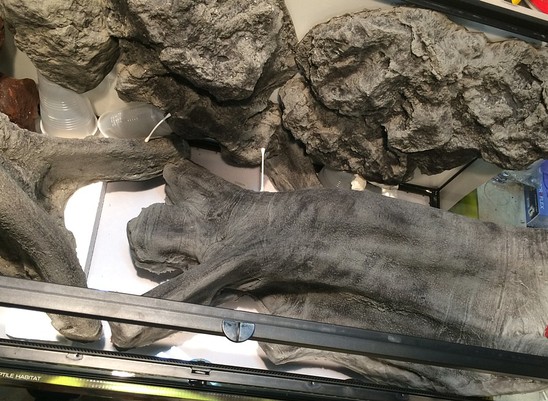
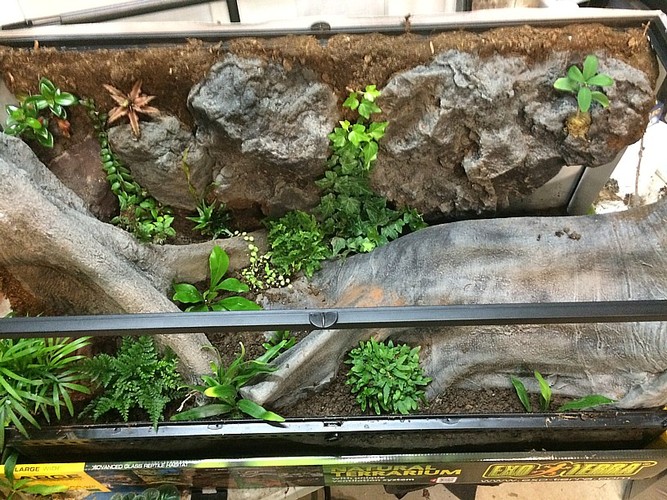
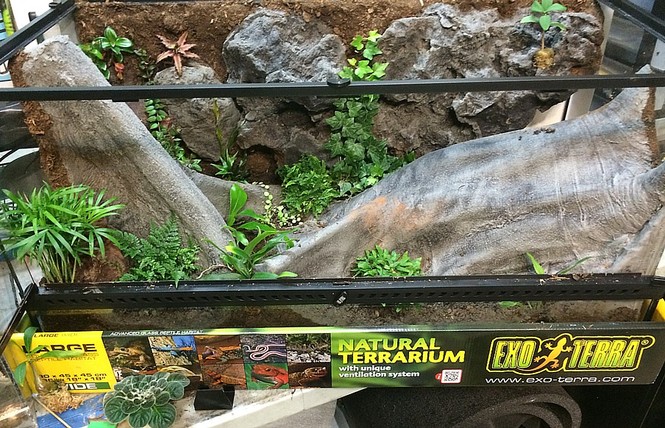
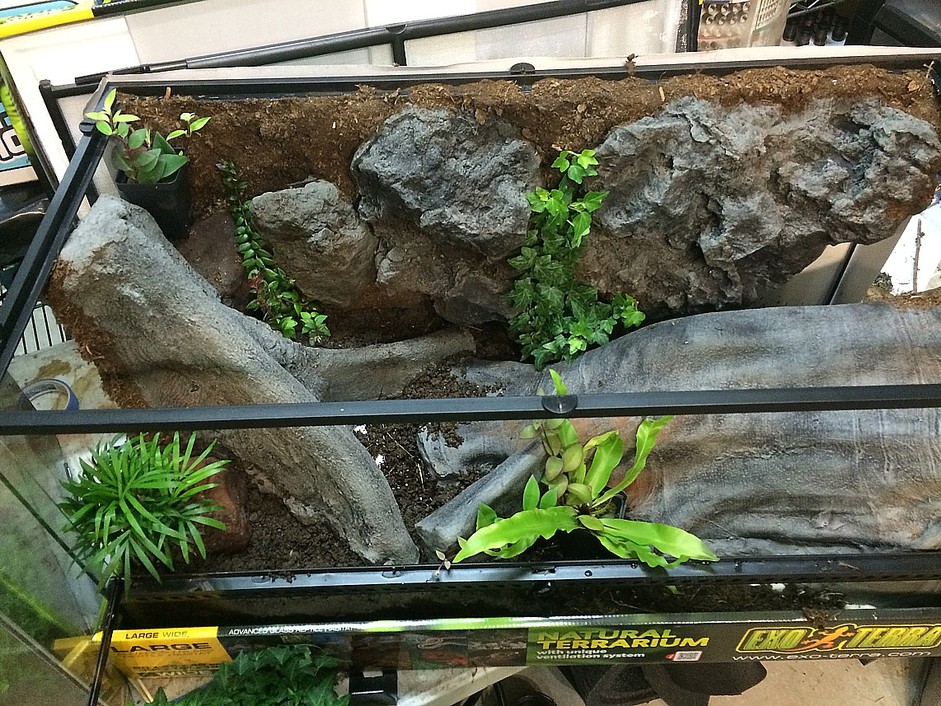
Starting with the empty terrarium I placed the rocks along the back and banyan roots along the sides. The casts being very light weight make them easy to place and adjust until I decided on the proper spot for everything.
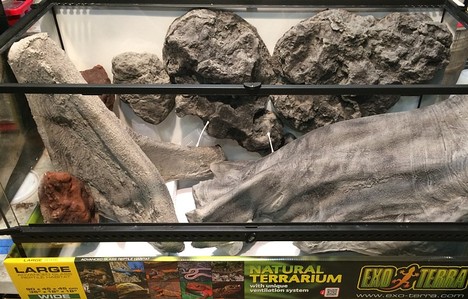
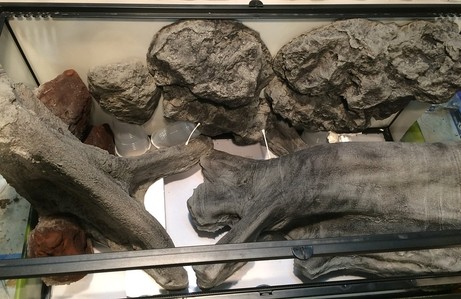
By using toothpicks, plastic cups, and cotton swabs, I was able to position the rocks onto the back of the glass without having to hold them.
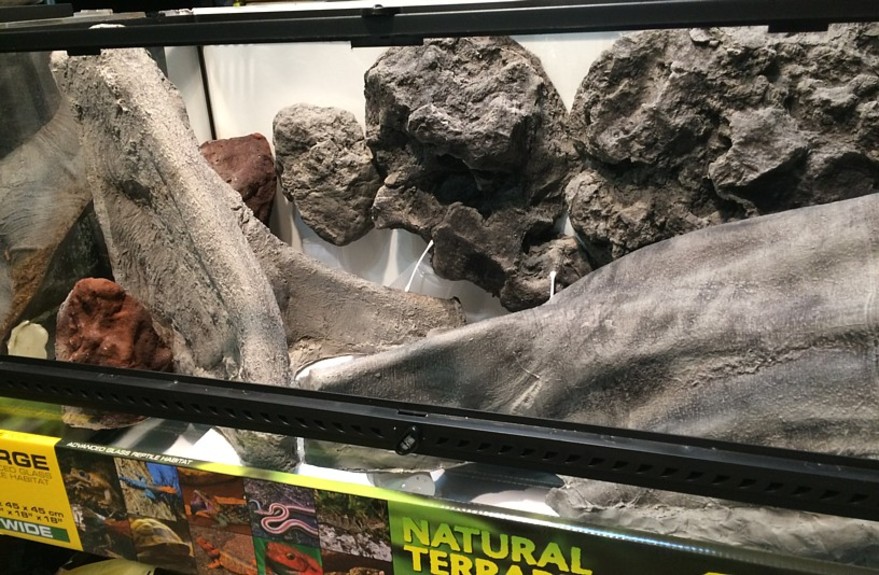
One of the nice things about the FlexResin is that it often has flat foam filled backs that easily lend itself to being glued against glass. By propping everything up in place and holding it there, I was able to apply the spray foam around the casts and behind them to act as glue and hold it all together as a single piece. I took care to try and fill all of the spaces that a dart frog would try an get behind.
One of the nice things about the FlexResin is that it often has flat foam filled backs that easily lend itself to being glued against glass. By propping everything up in place and holding it there, I was able to apply the spray foam around the casts and behind them to act as glue and hold it all together as a single piece. I took care to try and fill all of the spaces that a dart frog would try an get behind.
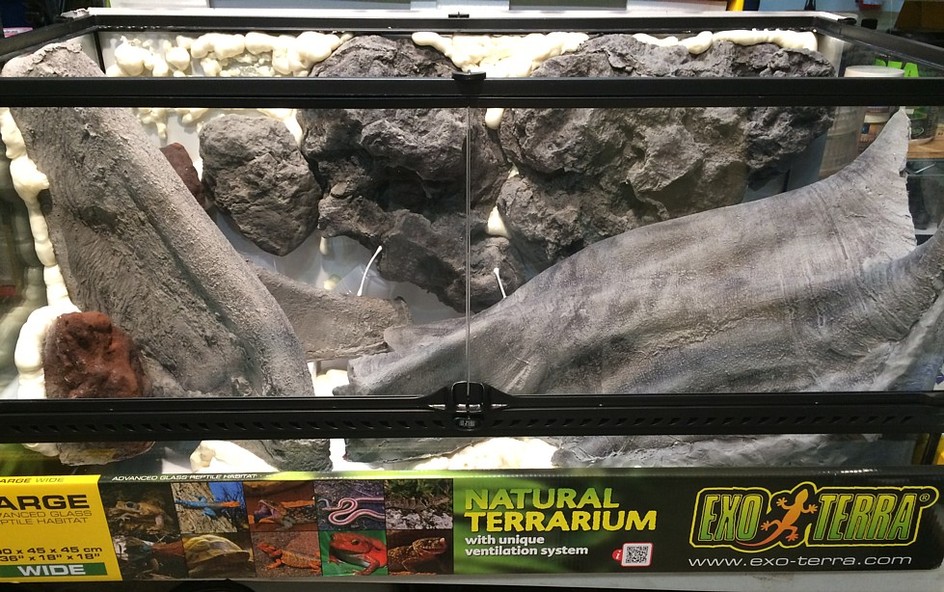
Holding the canned "Great Stuff" spray foam upside down I was able to spray out the foam along the glass, sides, and bottom of the terrarium to hold all of the rocks and tree roots together. I allowed it cure for 5 hours. It was humid and hot in the garage so if it is cool and dry where you are, it may take significantly longer for your foam to cure and become firm. Go slow and remember that the foam will try and take up a lot more space than it starts off. I find going with low volumes first and filling in areas with a second spraying works well. Using too much can make a mess. Also, once the roots are foamed in place, the terrarium can be placed on it's back and the rocks can be further foamed in.
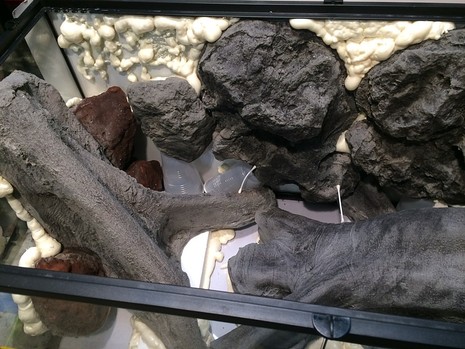
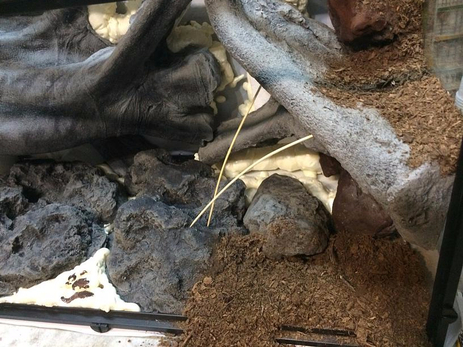
After the foam has solidified and cured, I began to apply the silicone sealant onto the foam with a nitrile glove. While the silicone is still wet, lumped large amounts of the dry sphagnum peat moss onto it. This was allowed to remain on the silicone until it cured. It takes about 3-10 hours to cure depending on conditions. I also pressed down on the mass of peat moss to help make sure it properly came in contact with the silicone. I also went in small batches at a time rather than large sections. This helps to ensure that the silicone sealant doesn't begin to cure and lose it's stick too quickly. When done properly the background will look like a dirt wall and not silicone.
Following this pattern of silicone, peat, press I moved across the background and glass/banyan root connections. You can find more detailed information about this method on this tutorial here: Foam, Silicone, Peat.
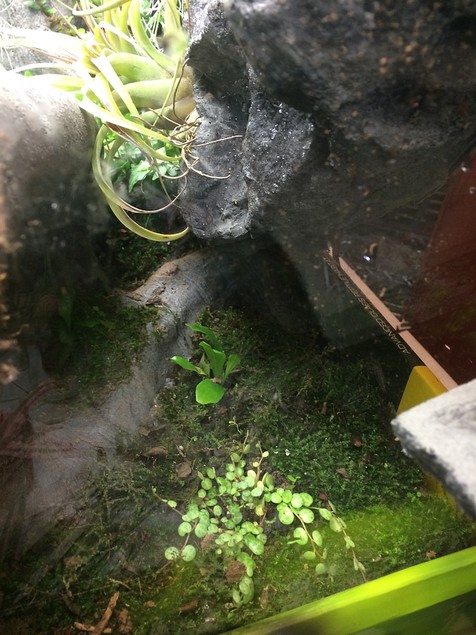
I then began to plant the tank with the various tropical plants I had collected from local tropical nurseries.
I then began to plant the tank with the various tropical plants I had collected from local tropical nurseries.
Before the soil was placed in, I put down a layer of the LECA pellets/balls to act as a drainage layer and to reduce weight. On top of that I put a layer of dry sphagnum moss. Then I put down the soil layer. The sphagnum moss helps to keep the soil from getting down into the drainage layer.