

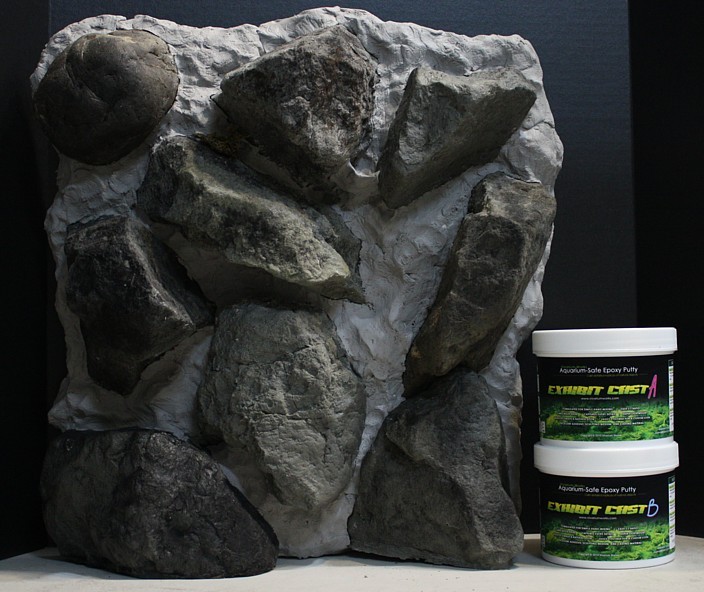
Exhibit:Cast
Foam Layup Material for Replica Rock Background
Foam Layup Material for Replica Rock Background
This build journal is simply meant to showcase the basic principle of how Exhibit:Cast can be used to strengthen a foam background by providing a waterproof, pH neutral layer over the foam used between the Replica Rocks. You can use this concept with real rocks, wood, or the lightweight Replica Rocks I produce. I opted for the Replica Rocks because it's what I had on hand. You can no doubt make a much more unique and improved design compared to this simple design and you can see at the bottom of the page pictures of other people's designs that have used this same technique with impressive results.
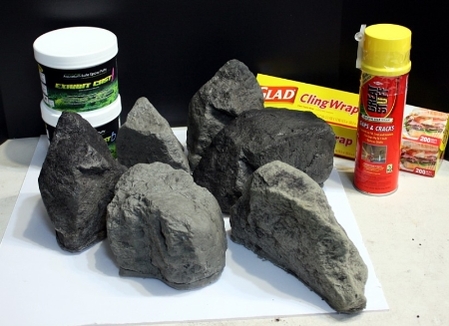
The material list for this design is:
Exhibit:Cast
Replica Rocks (or other materials of your choice)
Great Stuff canned foam (find at Home Improvement stores)
Plastic Wrap
Hard thin plastic or cardboard material
Exhibit:Cast
Replica Rocks (or other materials of your choice)
Great Stuff canned foam (find at Home Improvement stores)
Plastic Wrap
Hard thin plastic or cardboard material
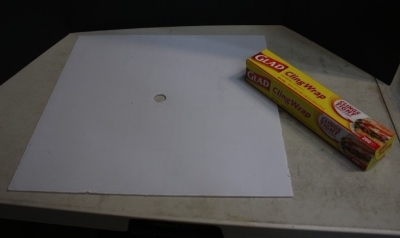
The hard thin plastic or cardboard material is just something you can make your background onto. You can just as easily do this directly inside your aquarium, but I find doing all of this outside, and then dropping it in, makes things a lot easier. This was just a scrap piece of plastic I had on hand and this could have been made on a piece of foam or cardboard that was cut to the size of the back glass of the aquarium. If that is the case, then the plastic wrap isn't necessary. The plastic wrap is only to keep the design from sticking to the plastic board in this case.
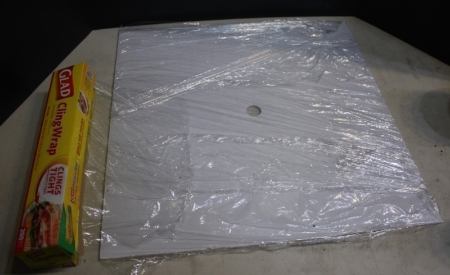
If you don't want to use a piece of foam to build your background directly onto you can use a thin piece of plastic or cardboard and wrap it in the plastic wrap. The canned spray foam will stick to this and not the cardboard or plastic sheet.
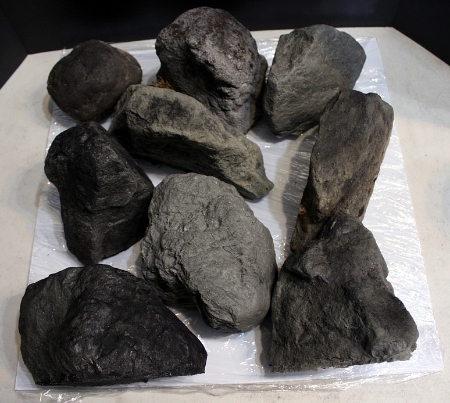
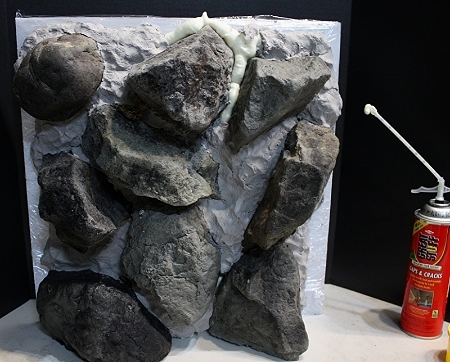
Before applying the foam, layout the objects you want to have bound together. I just used some spare Replica Rocks for simplicity, but you can add much more to make a complex background. At this stage you can easily add in PVC pipe to act a tunnel to hide submersible pump cords, flexible tubing to make waterfalls, or small micro tubing and splitter manifolds used for drip irrigation systems to make a dripping background. You can also use hard PVC pipe to pump in fog from an ultrasonic fogger for an effect that makes it look like fog is pouring out of the crevices in your background.
Other people have used this design to make some really impressive vivariums. You can see them here. All of these builds incorporated using Exhibit:Cast into the background over foam as a layup using the techniques listed above.
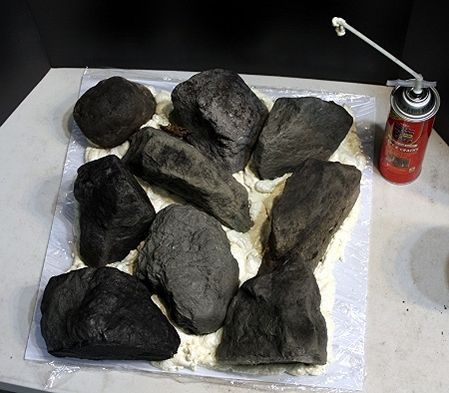
Once you have laid out all of your objects, hold the Great Stuff canned foam upside down and spray the foam out through the nozzle. The foam reacts with the moisture in the air and the more humid and warm it is the more it will expand and faster it will set. Use small amounts at a time and try to keep in mind that what you see initially, will expand to a much greater volume. Don't try to carve or adjust the foam at this point because it will just make a sticky mess. It is much easier to work with when cured. Also, avoid making too thick of a section as the bottom can sometimes not get enough moisture and not cure properly.
Set times vary depending on temperature/humidity but in most cases it will be cured in 4-5 hours. Waiting 24 hours is a good idea if used indoors or at cool temperatures.
Set times vary depending on temperature/humidity but in most cases it will be cured in 4-5 hours. Waiting 24 hours is a good idea if used indoors or at cool temperatures.
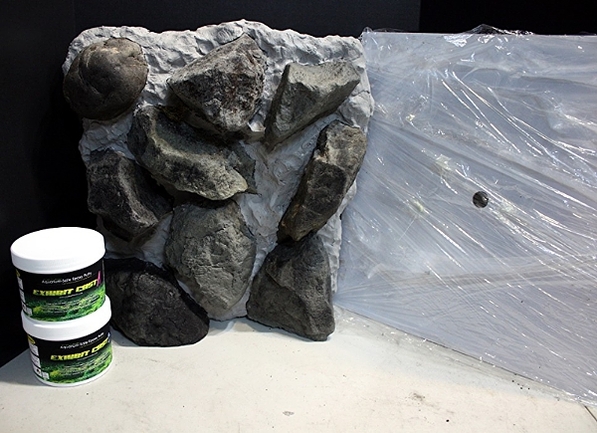
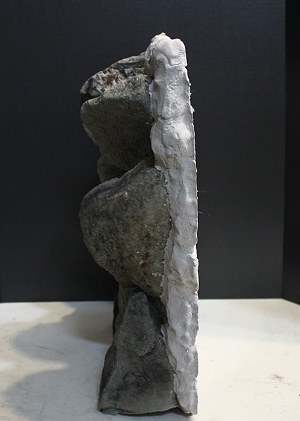
Once the foam has cured to solid, you can now apply the Exhibit:Cast over it. This will increase the strength of the background and provide a better color and look than the bare foam does.
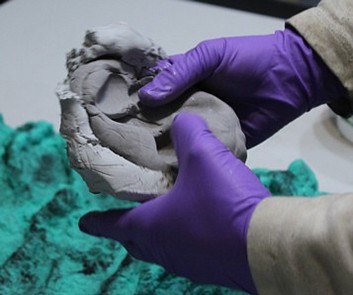
Mix the Exhibit:Cast, while wearing gloves, at a 1:1 volume ratio. You can gauge the amounts by rolling up the A and B sides into a balls of equal size then mixing them together. Kneed the two parts until they are an even color and begin applying over the foam by a gloved hand.
Mix the Exhibit:Cast, while wearing gloves, at a 1:1 volume ratio. You can gauge the amounts by rolling up the A and B sides into a balls of equal size then mixing them together. Kneed the two parts until they are an even color and begin applying over the foam by a gloved hand.
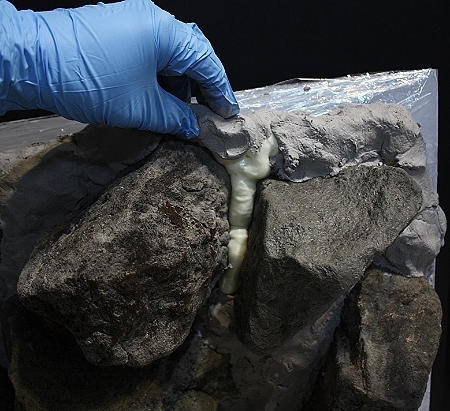
The mixed Exhibit:Cast can be applied over the foam and between the cracks of the rocks like clay. You can press it into areas you want to fill, make water paths for a waterfall with it, or make small soil cups/dams with it for places to put plants. A more advanced technique is to use a texture stamp made with Exhibit:Mold and press it onto the Exhibit:Cast to give the putty a more realistic look.
Once applied to all areas, allow the putty to cure for 5-24 hours depending on temperature. It will solidify long before that but will not have a full cure before 24 hours.
Before the Exhibit Cast fully sets, you can press things into it to make a unique look. Dry sand, soil, peat moss, or coco fiber can give a unique look. By pressing the dry material into the putty you can get some of it to stick and hold and achieve a dirt, bark, or sandy look.
You can also wait until it is cured and paint it.
After the foam and Exhibit:Cast has cured you can remove the background from the plastic wrapped cardboard or plastic sheet. If you have built this onto a piece of foam, the canned foam and putty will have bound to it and you will be able to take the entire background and place it directly into your tank. An advanced technique, for multiple tanks that will sit next to each other, is to make a single large design outside the tank onto a piece of foam and then cutting the entire background into sections and gluing them in order into the tanks. Done right this can make it look like a Replica Rock or wood piece is moving through the glass.
Your background is done and you can now use it in your vivarium/aquarium knowing that the foam is hidden and protected by the vivarium/aquarium safe epoxy putty and it can hold together longer and take more abuse than other layup materials can offer.