

Design It Yourself Kit
Mold and Cast A Realistic Rock Background
Mold and Cast A Realistic Rock Background
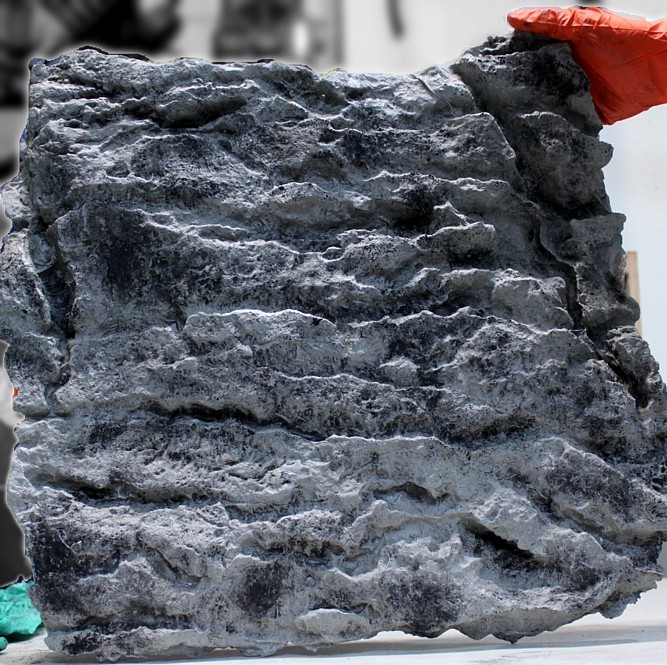
This tutorial is designed to showcase the main function of the DIY Molding/Casting Kit. The primary use of this kit is to allow you to make a custom realistic rock background. I was asked by many customers to offer a user friendly home version of the methods that I use to produce my backgrounds and this is what I've developed. You can see the primary use of the Exhibit:Mold and the Exhibit:Cast in this build and can see the realistic results above.
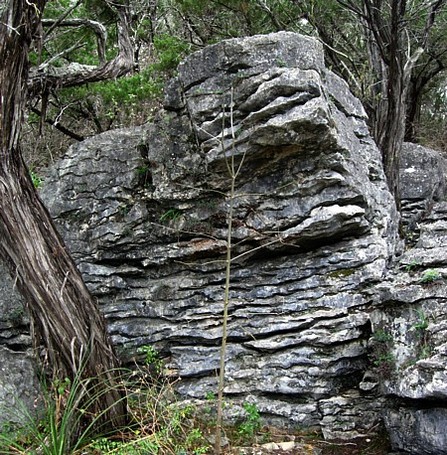
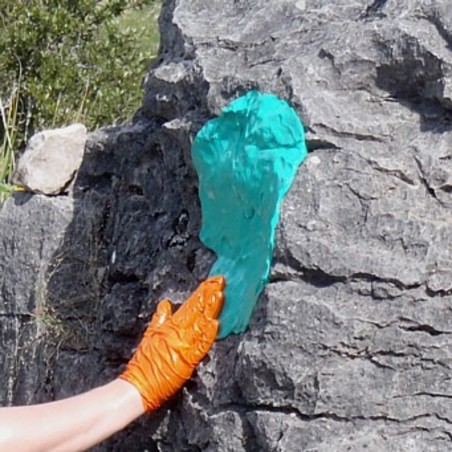
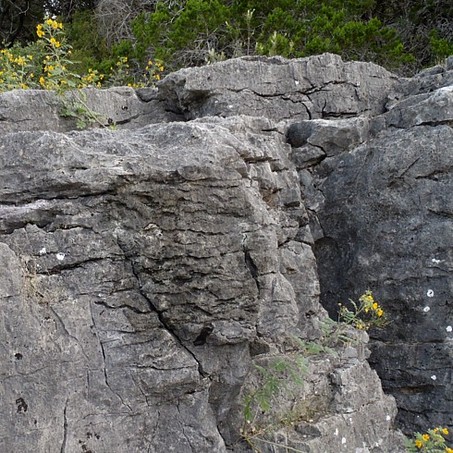
Locate the rock formation you wish to copy. I found this unique formation at a local state park. When choosing what to copy, try to find textured formations that have a lot of detail as you won't have enough material to copy the entire massive boulder. I like to bring a measure tape with me so I can make sure the area I plan to mold will be the right size for my aquarium.
Exhibit:Mold is a two part silicone putty that mixes at a 1:1 volume. You can easily determine this ratio in the field by making a ball of side A and then side B and comparing the two. Once you have an equal volume, mix and kneed the two together until you have an even green color. There should be no white or green streaks. Exhibit:Mold has been formulated to be easy on the hands when mixing two fist sized volumes of material together and this is the maximum amount of material I recommend to mix per batch.
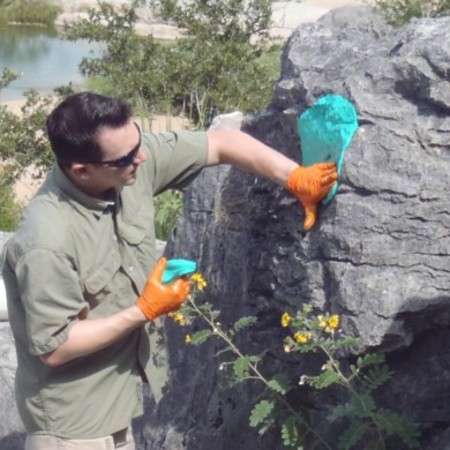
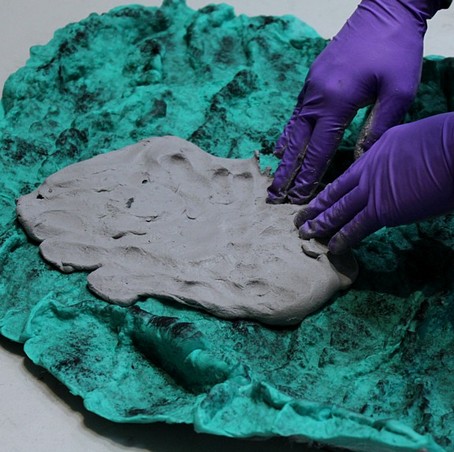
Apply the mixed Exhibit:Mold to the rock formation by pressing it firmly onto the rock face. I find that pressing the material along from thicker areas to thinner areas works well to spread it further than expected. In most cases you don't need your mold to be thicker than about half the width of your finger. Thicker molds are stronger and more durable but they cost more to make as they use more material. You should not be able to see any of the rock poking through the mold or just underneath it. The Exhibit:Mold should completely cover all of the rock textures.
When molding areas larger than your first batch can cover, you can add more material in subsequent batches. Mix using the same technique as before and apply onto the rockface. The areas where the new batch and the old batch meet, you need to make sure you press them together well. You don't want the old batch to have begun to set too much as you want the two batches to press and combine together. Doing this helps to reduce the mold lines that are caused by the gap in mold where different batches meet. For large molds I find it works well to have an assistant to help you mix batches while you apply each batch onto the rock. This lets you press the different batches together before they begin to set.
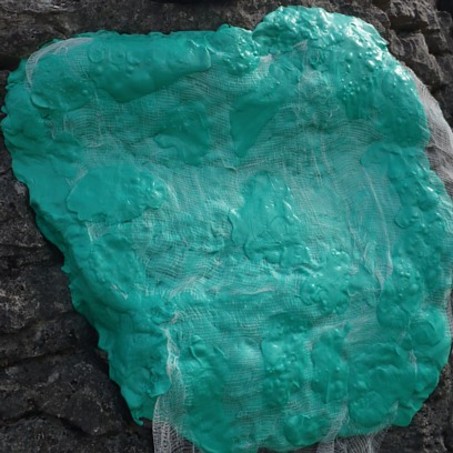
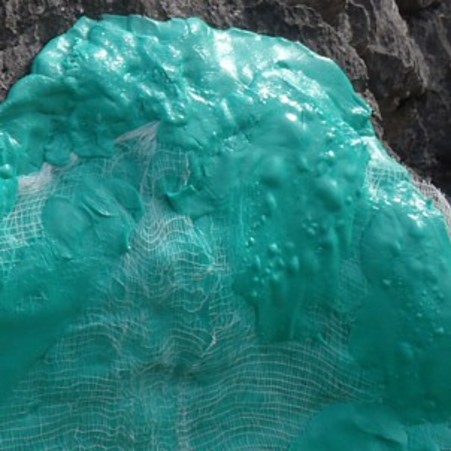
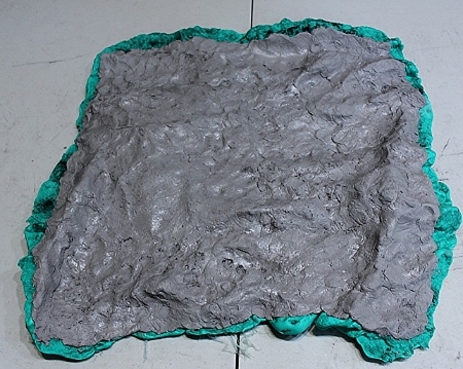
One of the downsides of silicone putty is that it can tear easily. Once a tear gets going in a mold it can be hard to get it to stop. One of the best ways to avoid this is to support your mold using a cotton gauze fabric embedded in the back of the mold. This helps to support the mold while also acting a rip/tear stop material. The kit contains cotton gauze for this purpose. Before your mold has cured, open up some of the cotton gauze until you can see the square grid of the material. Press this into the back of the mold just enough for material to cover it but no deep as to have it come in contact with the rock face. You can add small amount of more Exhibit:Mold to the back to help embed the gauze into the mold if it has begun to harden too much. Ideally you will want to apply the cotton gauze before it has begun to set. Usually within the first 7-10 minutes.
Exhibit:Mold will require an hour to cure at about 75-80F. If it is much colder than that it will take longer and if it is hotter it might take less time. You can check the cure state of your mold by touching the last batch you applied. If it is still sticky and has not solidified, it still needs to cure. Thicker molds will cure faster than thinner molds. In most cases I find that waiting one hour after the last batch has become hard gives the mold enough time to cure. If it begins to rain on your mold, try to cover it but if it does it shouldn't harm it as silicone is hydrophobic and the water should just run off it without damaging it.
One thing to note is that when curing, Exhibit:Mold will sometimes exude a mineral oil. This is normal and can be wiped off with a paper towel. I try to wear gloves when handling the molds as the oil can be a nuisance to get off the hands.
One thing to note is that when curing, Exhibit:Mold will sometimes exude a mineral oil. This is normal and can be wiped off with a paper towel. I try to wear gloves when handling the molds as the oil can be a nuisance to get off the hands.
Once your mold has cured, begin to demold it from the rock face. Take your time and go slow. You will want to start at one end and try lifting and peeling it off the rock while supporting the material as much as possible. A good trick is to push your fingers in between the rock and the mold and slowly push up. Moving your fingers along the mold slowly you can push off the mold. If you get stuck on an area, don't use force. Try a different angle. Start demolding from a different edge and see if when you get to that section it will demold from that angle easier. Large crevices can sometimes be challenging to get right and one of the tricks I have had success with is to use a flathead screwdriver to push the molding material out from the crack from inside the crack if I can get it in just a bit. Exhibit:Mold captures great detail and as such can be hard to remove from certain types of rocks. Go slow and if it should tear, don't worry about it, there are ways to repair it.
Exhibit:Mold is a silicone putty and will leave a slight shine on the rock. This is from a non-toxic mineral oil in the putty and will degrade quickly in the field.
I like to bring a black trash bag to put my mold into to help keep the mineral oil from smearing on things. It can also help to warm the mold up by the sun and improve/finalize the cure.
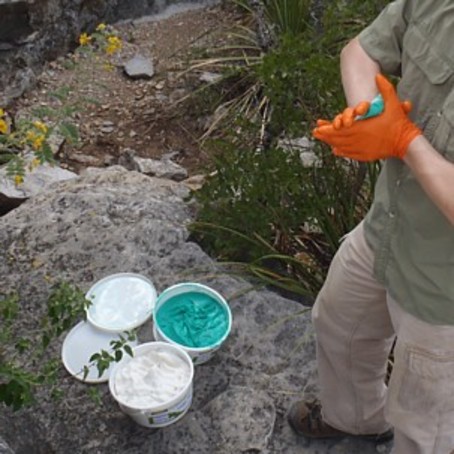
If you have a particularly challenging mold or it was hard to demold from your rock-face, you can apply, before brushing on the pigment powder, a very light coating of baking spray "PAM". This will act like a mold release agent and help your demold of your cast. You can then wash it off your cured cast before using it.
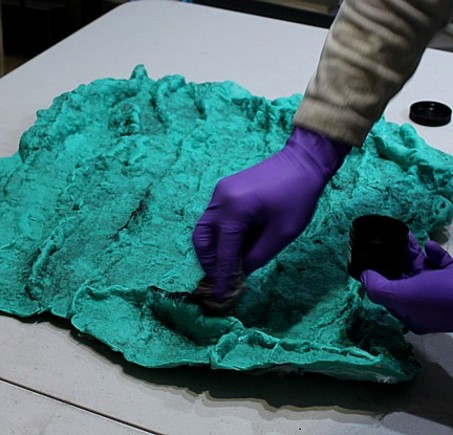
In the DIY kit, I have included iron oxide pigment powders. The black pigment powder can be brushed onto the highlights, bumps, and ridges of your mold with a paper towel. What this does is make your mold's texture pop out on your cast because the hills/ridges of your mold will the recesses/cracks of your cast. The black iron oxide powder will darken the recesses and cracks of your cast and greatly bring out the texture of your cast.
An advanced technique is that you can rub other iron oxide colors, sands, or dry soils into your mold to help give your cast a more dirty and realistic look. This requires some experimentation to get right however.
You will need to wear gloves while handling Exhibit:Cast! It is an epoxy and the amine hardener can cause a sensitization reaction if exposed to it over time. To avoid this always wear gloves and avoid contact with uncured epoxies. Once cured it is 100% safe, but until then, wearing gloves is necessary.
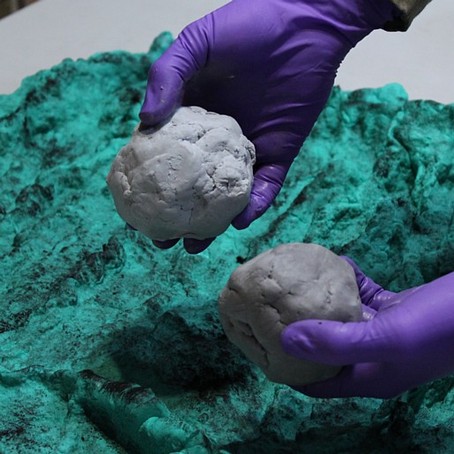
To mix the Exhibit:Cast, make equal sized balls of material just like you did with the Exhibit:Mold. Mix and kneed part A and B together until they make an single uniform color. I like to to this over a trashcan as sometimes while mixing small bits can fly off and this helps to keep the mess down.
To mix the Exhibit:Cast, make equal sized balls of material just like you did with the Exhibit:Mold. Mix and kneed part A and B together until they make an single uniform color. I like to to this over a trashcan as sometimes while mixing small bits can fly off and this helps to keep the mess down.
Apply the Exhibit:Cast on your mold by pressing it down onto it. When first mixed it can sometime be a little sticky and prefer to stick to your gloves than the molding material. A few tricks to help with this is to put down a large volume of material and then push it around the edges like you see in the picture. Slowly pushing the putty along. Another trick is you can mix multiple balls of material and let them begin to cure and heat up. This reduces their stick a bit and can make it easier to apply into the mold.
Once the mold has been covered with the Exhibit:Cast, you have a few options.
If your mold is larger than your background, you can use this time to "cut" the putty before it has cured. You can do this by taking a popsicle stick or other non-sharp object and a ruler and make lines all the way down in the putty to the silicone mold. Don't cut the mold! What this will do is make easy to break points along your cast so that after you demold it, you can snap off the edges and your mold should fit into your background perfectly.
Another option is you can let it cure and then cut the background to your liking. This can be done with a fine-tooth hacksaw. It can be a lot more work than the above method so I recommend making the lines in the uncured putty unless you have access to a tablesaw or other power tools and can easily cut the cured background.
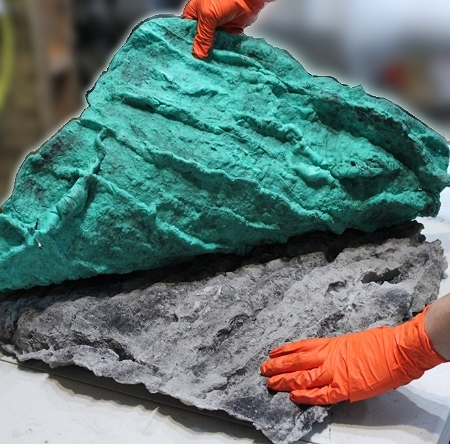
Exhibit:Cast will setup in about 1-4 hours depending on the temperature. After the initial set, it will need to cure for 12-24 hours. Once it has set, you can demold your background.
Just like when demolding the mold from the rock face, go slow and take your time. If you reach an area that doesn't want to demold, try a different angle. Again using your fingers to press between the mold and cast will help to slowly separate the two with minimal tearing on the mold.
Proper care and diligence when demolding will allow you to use your mold again and again!
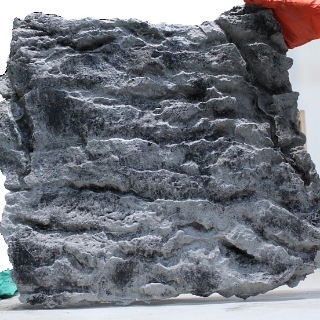
Your cast will be very strong and very light weight. It can now be washed off and used in your aquarium/vivarium and last for years against even some of the most demanding reptiles. Exhibit:Cast is an epoxy and when cured is 100% inert and pH neutral. It does not contain nonylphenol, unlike most other epoxy putties, and is 100% fish, dart frog, and reptile safe when cured.