

40 Gallon Planted Tank Build Journal
This build journal is to show how I made the aquarium seen below. I hope this can give you some helpful ideas, techniques, inspiration, and specific knowledge to build your own design. I have tried to be as specific as possible with what materials, tools, and techniques I used to build this aquarium. I have linked some of the materials used that I sell to the pages that contain them.
The purpose of the this display was to house an axalotl in a planted tank, but still having a portion above water that could be taken over by mosses. I wanted to mimic a rocky shore made up of smooth, water weathered rocks with lots of live aquatic plants.
The purpose of the this display was to house an axalotl in a planted tank, but still having a portion above water that could be taken over by mosses. I wanted to mimic a rocky shore made up of smooth, water weathered rocks with lots of live aquatic plants.
The material list for this build was:
40 Breeder Aquarium
7 Smooth Rock Set x 2 (Flex Resin)
10 Small Rock Set A x 1
Large Sandstone Rock 1 (Flex Resin)
Great Stuff canned foam (find at Home Improvement stores)
Exhibit:Cast
1/2" bulkheads
Cascade 500 Canister Filter
Red Sea Flora Base Planted Tank Substrate
Live Aquatic Plants
Lots of Java Moss

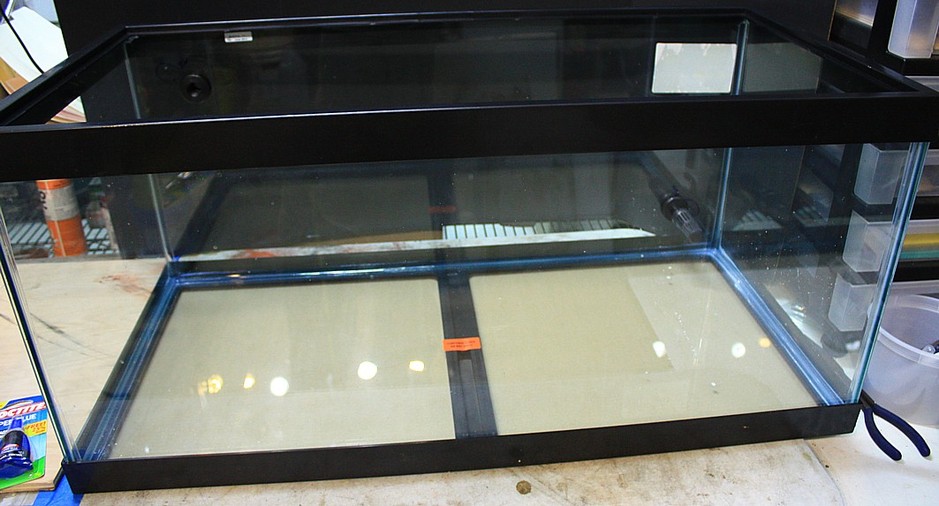
Starting off with an empty 40 Breeder size aquarium from a local chain pet store, I drilled two holes in the back to fit the 1/2" bulkheads. These were drilled along the BACK of the aquarium and not the bottom which was tempered. (See orange sticker on bottom, says 'tempered don't drill').
Drilling an aquarium can be a bit of as task in of itself and in many cases I recommend having a local aquarium store do this for you unless your'e the DIY type. If so, you can get diamond tipped drill bits from www.glass-holes.com. Lots of videos on Youtube, I'm not going into that here as you could have just as easily have placed the filtration hoses into the back without drilling the tank. I prefer this technique over not as it makes the hoses much easier to work with and gives me better control over my hardscaping as I don't have hoes to hide.
Drilling an aquarium can be a bit of as task in of itself and in many cases I recommend having a local aquarium store do this for you unless your'e the DIY type. If so, you can get diamond tipped drill bits from www.glass-holes.com. Lots of videos on Youtube, I'm not going into that here as you could have just as easily have placed the filtration hoses into the back without drilling the tank. I prefer this technique over not as it makes the hoses much easier to work with and gives me better control over my hardscaping as I don't have hoes to hide.
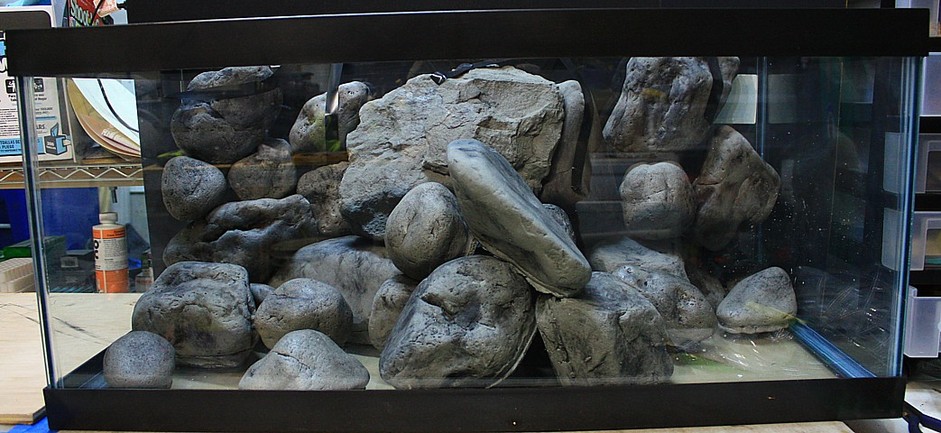
I knew I wanted a small waterfall on the left side of the tank and I started off with this. By cutting into the foam of one of the 7 Smooth Rock Set replica rocks I was able to cut a path for the tube to go from the bulkhead to the start of the waterfall. You can see the tip of the threaded spout just above the top left rock. This is one the main advantages of the Flex Resin rocks. They can be cut, carved, and shaped to fit your needs with ease.
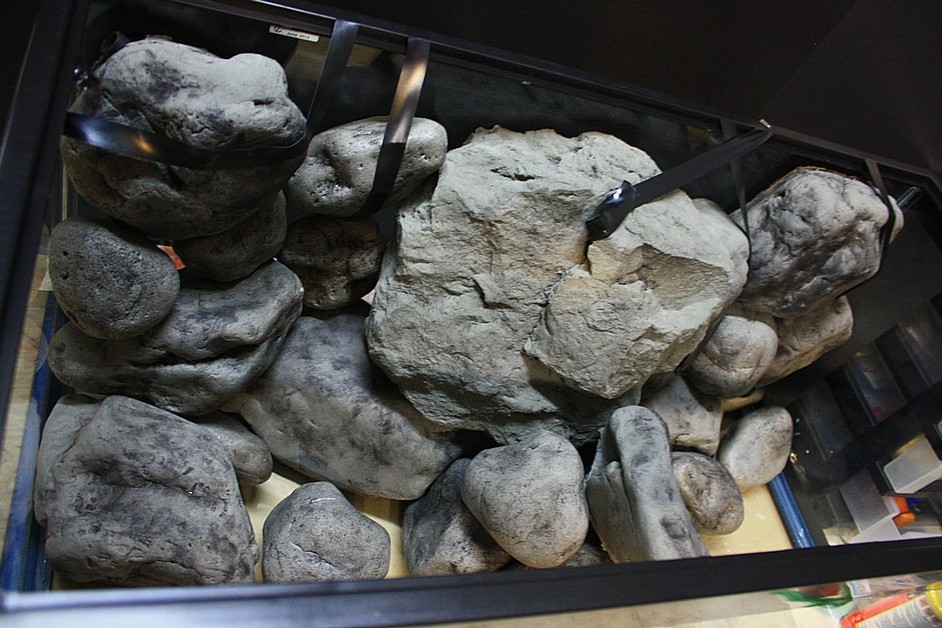
Next I piled up the design as I I wanted. I wished to have two segregated water bodies that water had to flow over mosses to move from one body to the next. I used rocks from the 10 Small Rock Set A and from about 1.5 sets of the 7 Smooth Rock set, and the large focal point rock is the Large Sandstone 1.
I held everything together with gravity, tape, and some toothpicks. Toothpicks work well to skewer into the foam support of one Flex Resin rock and then another adjacent Flex Resin rock. Won't hold permanently but it holds long enough for the Great Stuff canned spray foam to set.
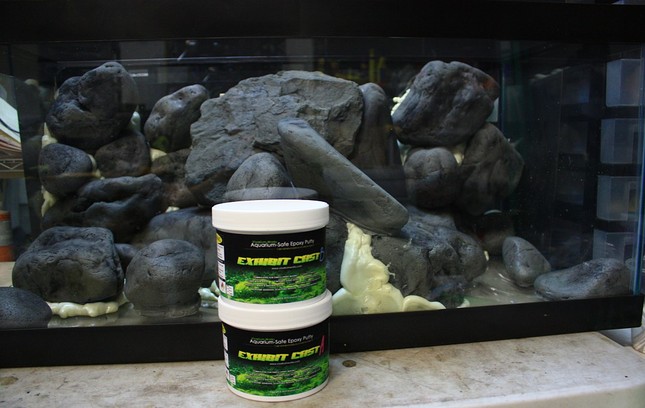

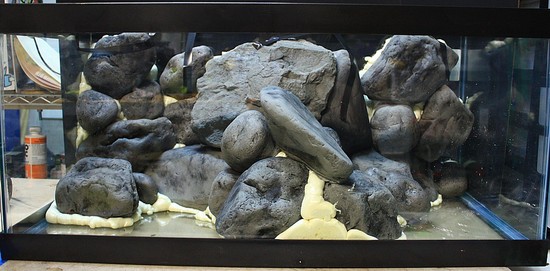
Using the canned polyurethane spray foam "Great Stuff", which can be bought at any hardware store or even 'Walmert', I sprayed foam all between the cracks of the rocks and glass. This is can be a tricky part but it's not that hard. Holding the can upside down you spray the foam out through the plastic nozzle into the cracks and connections. You need to make sure you turn the entire piece into a single solid unit and that unit is foamed to the glass well. Notice I didn't go crazy with it and foam all of the back or the bottom. That isn't necessary, but a lot of the back volume behind the rocks along the back glass has been foamed. The foam adheres well to glass when used properly and will bind to the rocks VERY well as they are chemical cousins of one another. The foam will expand and cure based on the humidity and temperature. I recommending doing this step in the garage or outside. I allow this to cure for 4-24 hours depending on temperature/humidty. Colder takes longer, warmer and wetter takes less time. If in doubt, go slow and add layers ontop of foam that has already expanded.
After the foam has solidified I use Exhibit:Cast to protect/cover the foam, make it look like the rock, and help glue the replica rocks and glass more. Following the instructions, I mixed by gloved hands, the epoxy at a 1:1 volume ratio. I Then applied this over the foam like playdoh. For more info on this technique see here.
Exhibit:Cast Foam Layup Tutorial
Exhibit:Cast Foam Layup Tutorial
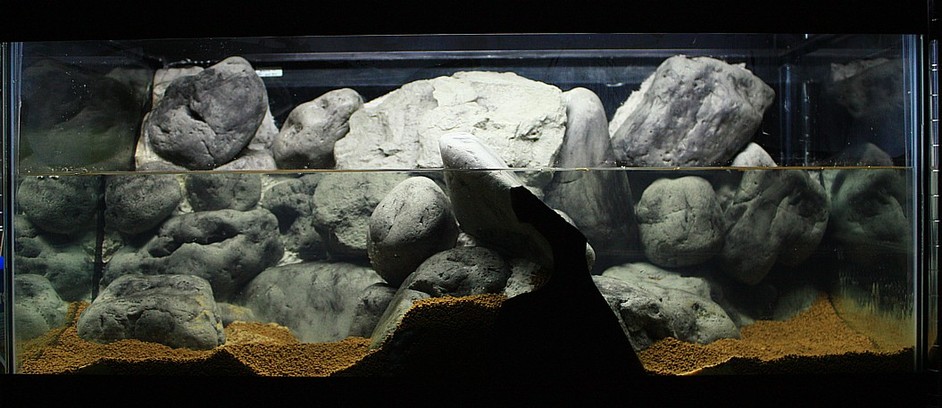
After I let the Exhibit:Cast cure, I spraypainted the front glass after taping it off to hide the yellow foam and I used black contact paper on the back glass and sides. I then moved the tank to it's final location, attached the hoses to the Cascade 500 canister filter, and added the Red Sea Flora Base. I allowed the aquarium to cycle for a few days after I put some water in from another aquarium to try and get the nitrifying bacteria colonies established.
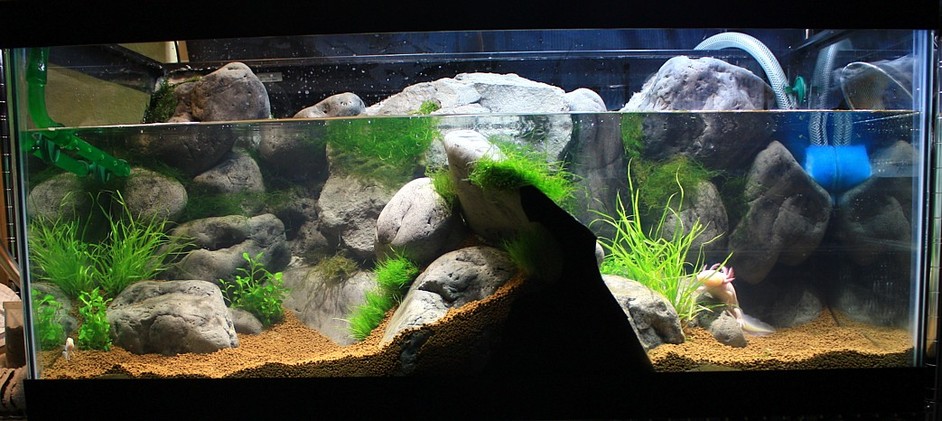
I used lots of java moss to fill in the spaces between the rocks and various assorted aquatic plants as well. I noticed the canister filter was not moving the water from one section to the other as much as I had liked so I put a simple pump to draw water from the right side top to the left side top. It keeps the circulation moving. The animal on the right is an albino axilotl that was genetically modified to fluoresce under black light due to the addition and expression of the GFP (green fluorescent protein).