

Build Journal
"Isomer Tanks"
"Isomer Tanks"
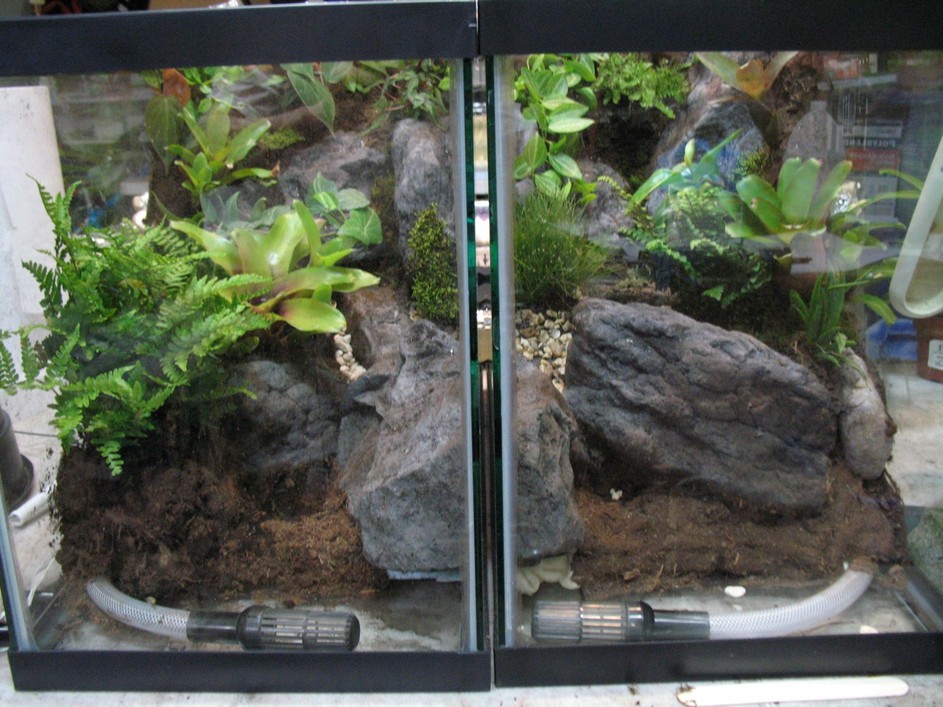
This tank build was done to show how adjacent aquariums can have a single background that moves from tank to tank. The basic concept is that by building the background onto a foam support, you can design the entire background and then cut it to fit and glue it the back and side walls of the tanks next to each other so it looks like the background just moves through the glass. In chemistry an "isomer" is a left or right (Cis or Trans) facing molecule that is chemically identical other than the way it is shaped. So that's where the name comes from.
The build starts by knowing what my aquarium sizes are and it's desired orientation. This was a unique build in that the necessary location was deeper than it was wide or tall and so a design of a sloping waterfall toward the front glass was made. Also the traditional orientation of these 2 20 gallon aquariums was rotated so the front viewing was on what is normally the side pane.
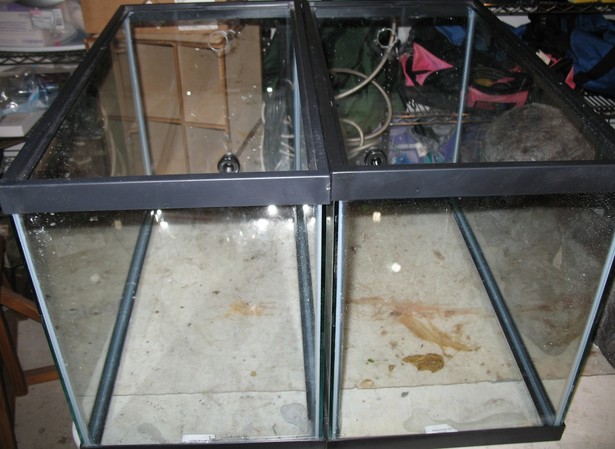
I drilled holes in the glass using the technique you can find on this page here. And I plugged them bulkheads. The purpose of this was to run the twin waterfalls and drains through a single canister filter. By connecting the two bottom bulkheads to each other with a T barb I was able to draw water from both aquariums into the canister. Also by putting a T barb onto the canister filter I was able to run water from the single canister filter to both waterfalls.

Next I using the Blue Dow EPS insulation foam you can get at Home Depot/Lowes I cut a bottom and back piece. By cutting them and place fitting them into the empty aquariums I was able to make sure my holes and tubing was properly aligned. Planning ahead for where your tubing is going to go will aid greatly in the ease of your build.
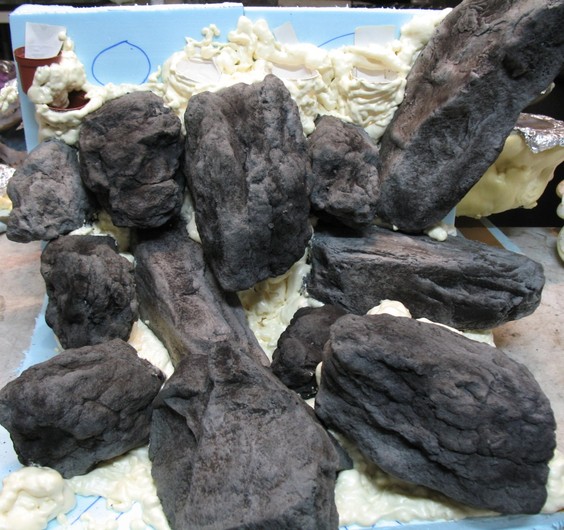
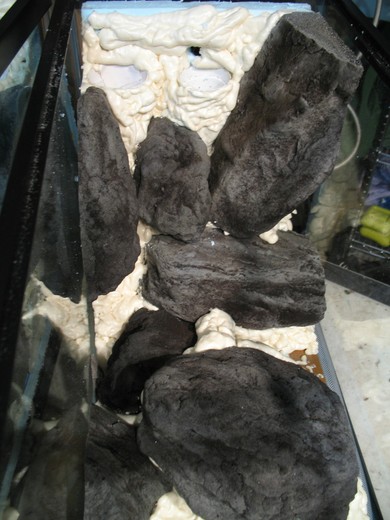
Then I put the two background foam pieces together and the two bottom pieces together and using Great Stuff canned spray foam, I glued them together. You can see the foam glue in the middle between the white cups. Next I taped on some plant cups and made my rock design using Replica Rocks made from the Flexible Foam. I intentionally made the larger rocks span the two sides.
Using the canned Great Stuff foam I sprayed the foam into all the holes and crack and exposed background. The foam expands and sticks to everything it touches and solidifies which makes all of the individual rocks and foam pieces now a single solid unit.
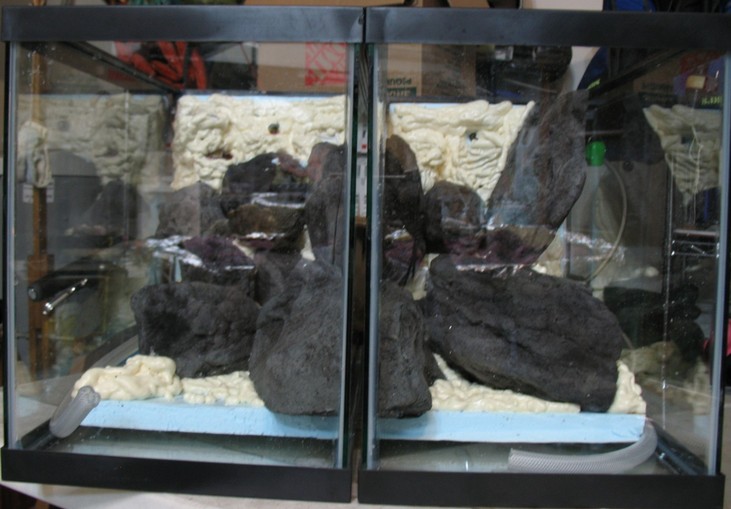
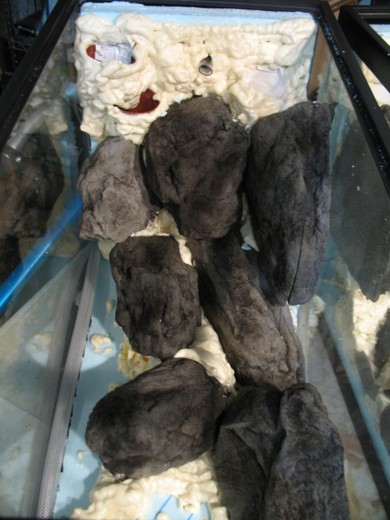
Using a hand saw I placed the blade along the connection where the two blue foam background pieces met and began to cut. I sawed straight down through the flexible foam Replica Rocks and through the spray foam matrix.
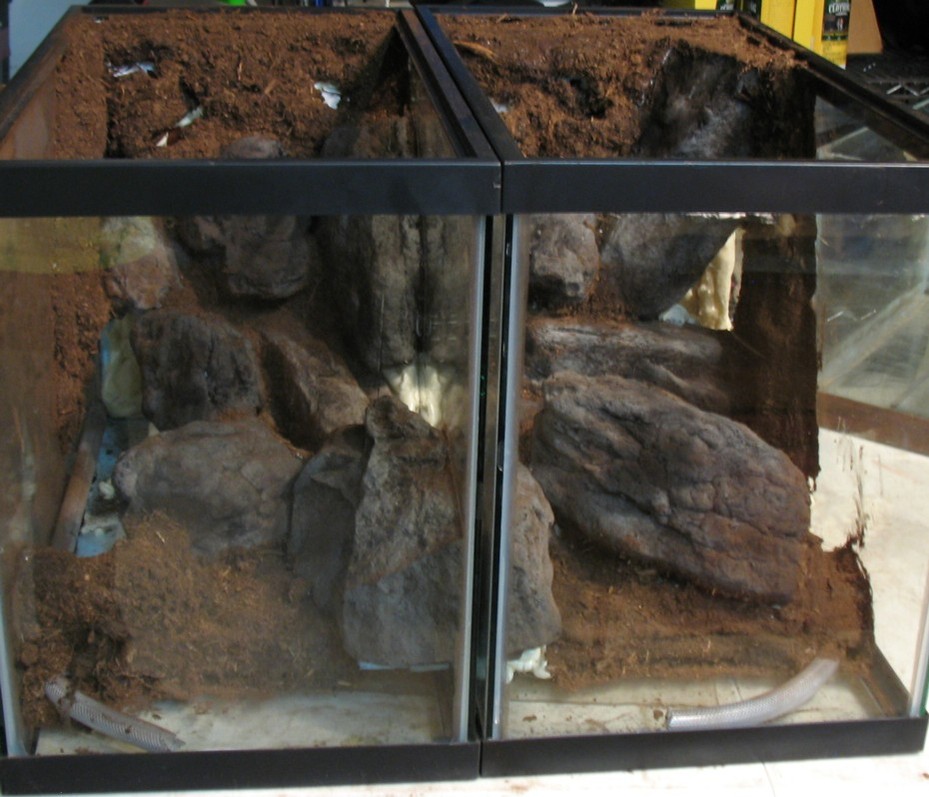
I then dropped both sides into their aquariums and attached the tubing to the pre-drilled bulkheads.
You can see how the front most rock is split and looks like it is going through the panes of glass.
You can see how the front most rock is split and looks like it is going through the panes of glass.
Left Side
Right Side
This step could have been done outside the aquariums but I chose to do it inside to reduce the mess.
By using the silicone sealant and peat method, further described here, I applied a layer of peat moss the exposed background and foam. I also took this time to apply a thin layer of black silicone between the glass and the Replica Rocks to help make it look more seamless of a connection and to keep it from being a space animals or dirt could fill.
By using the silicone sealant and peat method, further described here, I applied a layer of peat moss the exposed background and foam. I also took this time to apply a thin layer of black silicone between the glass and the Replica Rocks to help make it look more seamless of a connection and to keep it from being a space animals or dirt could fill.

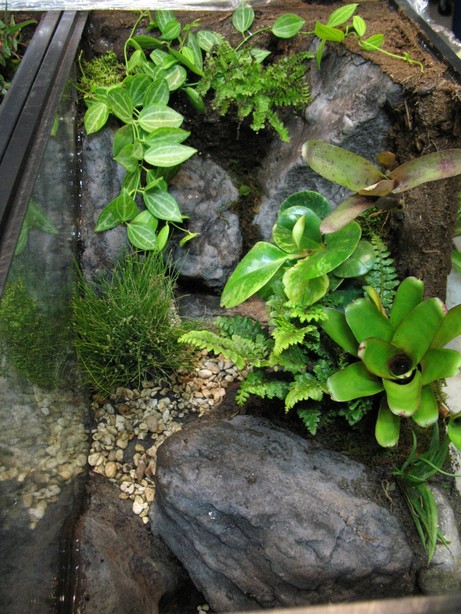
I planted both sides with similar types plants and used a light colored gravel to contrast with the replica rocks where the water would flow.
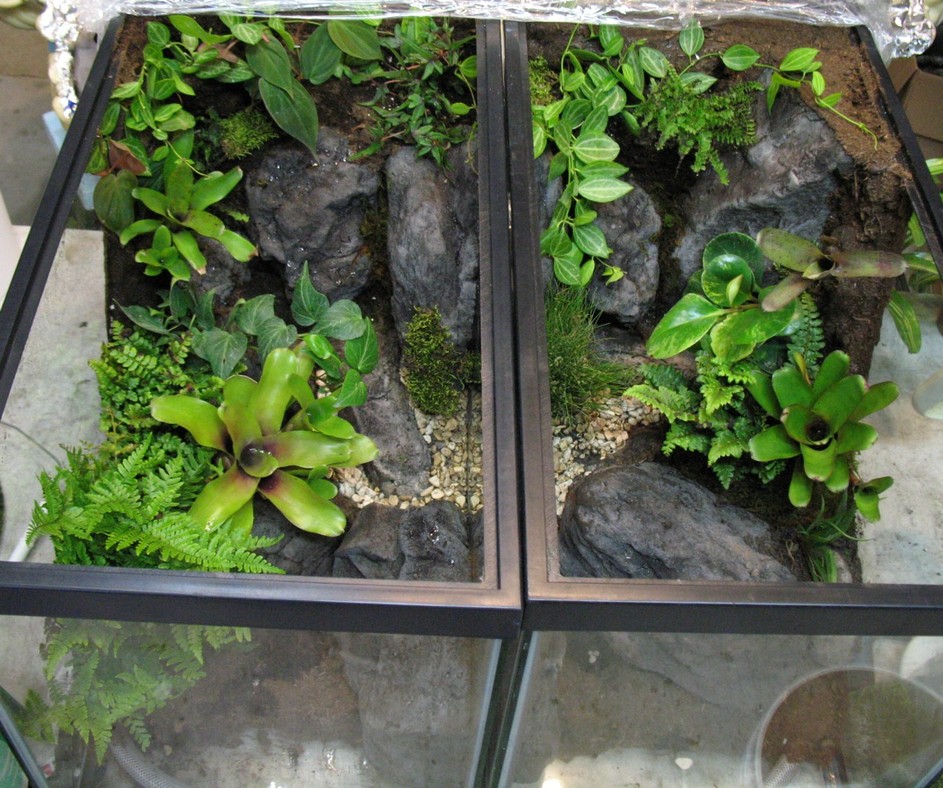
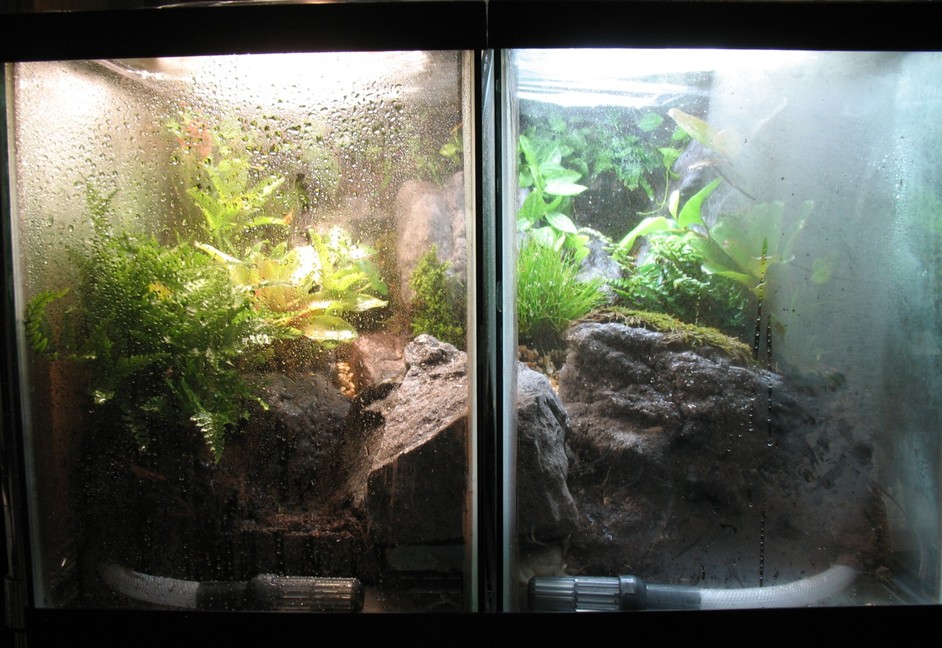
I delivered the finished design as is and only had to add some gravel to the front sections to hide the water intake tubing. Overall this build from start to finish took less than a day. The longest time was waiting for the spray foam to solidify enough to begin to apply the silicone sealant and peat.